Luxury Vinyl Plank (LVP) flooring
Russell Bateman
July 2026
last update:
|
For a 22-mil wear layer LifeProof Luxury Vinyl Plank (LVP), the overall
product thickness will either be 7 mm according to the description on the
box. The wear layer, which measures the thickness of the protective clear
top film, is exactly 22 mil (0.55 mm or ½ of a millimeter) across
all options.
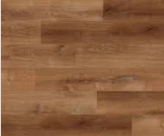
7.0 mm Overall Thickness: Includes Lifeproof® Trail Oak.
|
|
LifeProof® Trail Oak
|
We are going to take the trouble to put this down on the laundry room floor
too. A solution there is long overdue.
Getting started: Identifying Tongue and Groove
(Click on image to open it bigger in a new tab.)
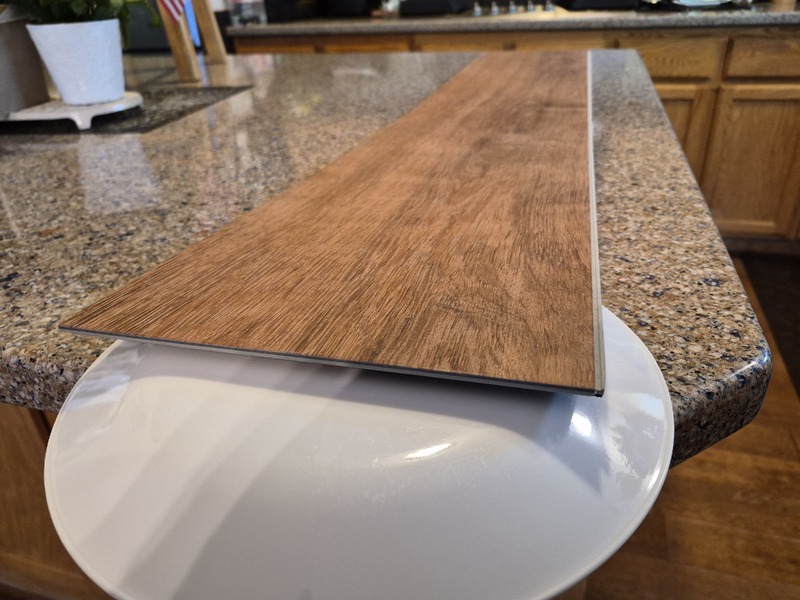
The Tongue
...on Lifeproof® planks:
The lip or edge that sticks out like a ledge against the floor; this edge
points out toward the room so the next row drops or locks into it.
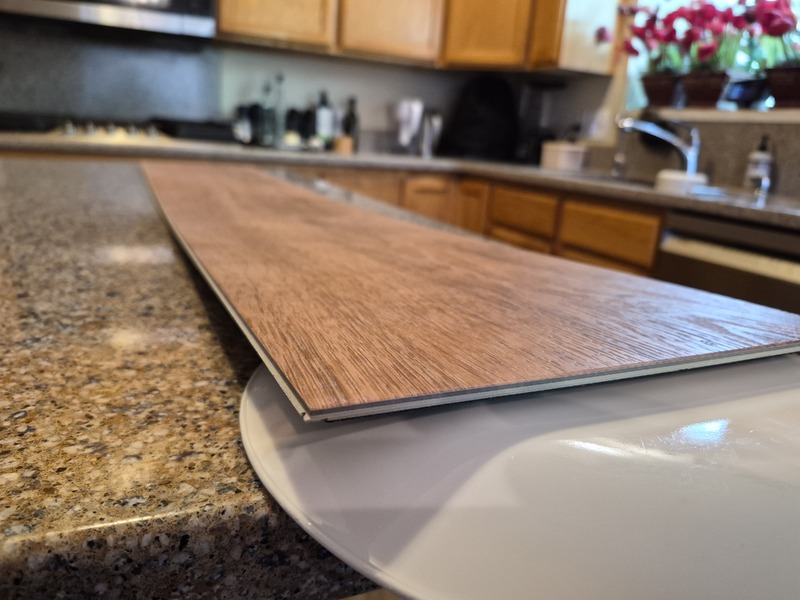
The Groove
The hollow slot or receiver channel edge that faces the starting wall if placed
backward, but should face away from your starting wall so you can lock the next
incoming tongue into it.Tip: Look at the side profile of the plank. The tongue
looks like a protruding lip, and the groove looks like an open mouth or slot
waiting to grab that lip.
The installation action...
...is essentially to engage the groove of the new plank into the tongue
of the plank that's already placed/installed. Then, pushing the new against
the floor locks the two together.
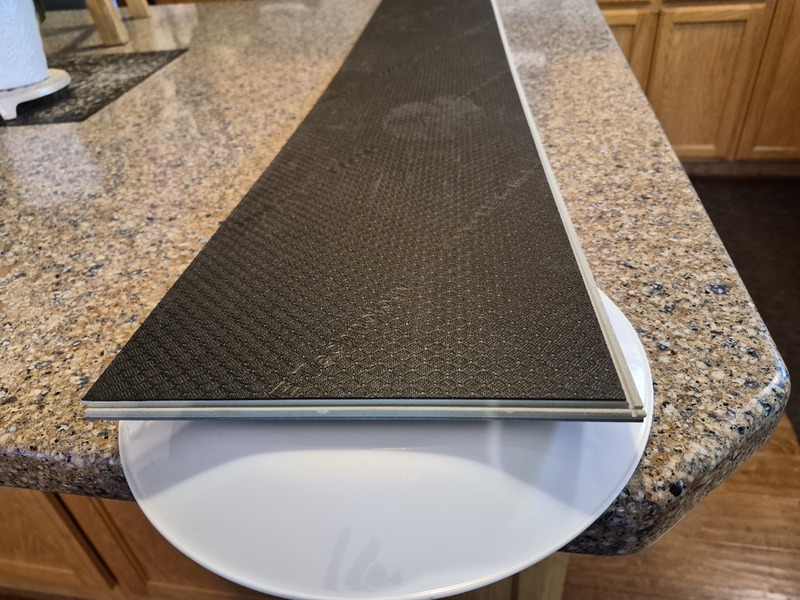
From underneath...
The "groove" is an overhang (on the right) which, from the top, appeared simply
to be the edge of the plank while the tongue (on the left), is much more
visible from the top.
Laying LVP
Use table saw to rip- or crosscut LVP, jigsaw to finesse partial
and complex adaptations (to vents, etc.).
- Open packages and mix the flooring together randomly.
- Remove baseboard and level floor.
- Set up any floor drains.
- Run along longest dimensions, left to right.
-
- Pencil out widths of planks on floor to see if they center
without leaving odd or too narrow pieces.
- Re-do pencil lines if strip widths will orphan (< 2" or 3").
- Trace a solid reference line one row back from starting wall.
-
- Use shims to hold from wall; use the "blue" shims, not the stupid yellow,
orange, etc. ones which lose themselves in the wall when you're not
looking.
- Stagger runs in thirds: full, ⅔, ⅓, full, ⅔, ⅓,
etc. Save starter pieces in order for next run each time.
- Install groove into longer tongue, slide back and forth,
then into butt of last piece at left.
- Tighten butt/end joint with finger strength.
- Once aligned, seated and snug, tap along open long edge in 3 spots
(along edge) to finish.
- Rap wood block over butt/end joint to ensure snug.
- Check seams with fingers to ensure no sharp
(and therefore open) edges left.
- At end of run, use shortest scrap handy, spin it around, position
against spacer, mark at butt/end edge, then cut.
Install using correct orientation.
- Once reaching other wall, use installation pull bar
since no longer possible to use block to snug.
A question to Gemini AI about reducing the amount of effort here
I have a laundry room floor covered, 23 years ago, using rolled vinyl. It's not
especially in bad shape, only stained with a couple nicks here and there. Also,
there is a drain in the floor underneath the washing machine. Do I dare put
down LifeProof 22 mil LVP over it without removing this original vinyl
flooring?
...and Gemini's answer:
Yes, you absolutely dare. In fact, leaving the original rolled vinyl intact
is recommended by the manufacturer and flooring installers alike,
provided the vinyl is securely glued down, in mostly one piece,
and not cushioned-back. The 22 mil Lifeproof LVP is thick enough 7 mm
that the minor nicks and stains will not "telegraph" or show through.
The original vinyl provides a great, stable vapor barrier and base,
but you must address a few critical details before laying your planks.
1. The Floor Drain Issue
Leaving an open floor drain beneath a floating floor is risky. Water splashes
or leaks from the washing machine could bypass the LVP and become permanently
trapped beneath your new floating floor, risking mold.
- Do not cover the drain completely: Flooring experts warn that
completely covering an open drain with LVP can trap harmful sewer gases
and moisture, which will cause the flooring to lift.
- The fix: Cut the LVP around the drain flange and seal the perimeter
with 100% silicone caulk to create a water-tight boundary. Then, install
an elevated drain grate or a shower drain ring that sits flush
with the top of your new LVP.
- Pro-tip: Consider installing an Oatey Washing Machine Pan
under your washing machine so that any minor leaks are safely directed
straight into the drain, rather than pooling on top of your new floor.
2. Subfloor Preparation
- Check for flat spots: Because you have a drain in the floor,
the original vinyl slopes slightly toward it. Lifeproof LVP can
accommodate minor sloping, but any severe deflection or dips
exceeding &frac316;" over an 8' span will cause the locking joints
of the LVP to pop loose or snap over time.
- Prepare the surface: Make sure there are no loose edges
or deep gouges in the old vinyl. Fill any nicks or dents
with a skim coat of a cement floor patch like Ardex Feather Finish
to keep the subfloor perfectly smooth.
3. Installation Requirements
- No extra underlayment: Lifeproof LVP already has a pre-attached
rubberized backing. Do not add another layer of foam underlayment
over the sheet vinyl, or you will void the warranty
and cause the boards to flex too much.
- Expansion gaps: Be sure to leave a ¼" expansion gap
between the new planks and the walls (and your drain). The planks will
need room to contract and expand with seasonal temperature changes
in the laundry room.
4. Managing Appliance Vibration
- A washing machine sitting directly on a floating floor can pinch
the planks down, preventing the floor from expanding and contracting
naturally.
- Use anti-vibration pads: Buy heavy-duty rubber anti-vibration pads
for the feet of both the washer and dryer.
- Why this matters: These pads absorb the kinetic energy
from the spin cycle. This stops the heavy machine from shifting,
protects the LVP locking joints from breaking under stress.
5. For the drain...
- Leaving a exposed bead of silicone around a raw cut edge of LVP
will trap hair and lint over time. You need a mechanical barrier
to redirect water over the seam and into the holes.
- Install a Stainless Steel or Chrome Collar: Purchase a split-flange
escutcheon plate or a low-profile shower drain trim ring (available
at hardware stores.
- Glue the ring to the drain, NOT the floor: Apply a bead of silicone
to the underside of the trim ring and press it down so it sits flat
over the drain and bridges over your caulked LVP gap.
Make sure the adhesive only contacts the metal drain center
or the original vinyl underneath—do not glue it to the LVP.
This allows the LVP floor to slide freely underneath the lip of the ring
while any spilled water is forced to flow directly over the top
and down into the chrome holes.
How-to videos